Sustainability
10 steps to DIY painting your home

Whether you’re looking to paint just one room or your entire home, taking it on as a DIY project can be fun and rewarding while giving your space an added personal touch. Gush paints are exceptionally great for DIY use because of its non-toxic and odourless properties. That just means you avoid chemical-induced headaches and can paint worry-free when paint drips on your bare skin. But painting is just 50% of the job. It’s also about planning, preparing and protecting your space. Not to worry, we’re here to break it down for you.
1. Have a vision

Before you begin, you’ll need a vision of how you’d like your space to look. Thinking of the ambience of your space can help tremendously. For instance, you might want to introduce some soft, romantic palettes in the bedroom, while using lighter colours to create a more spacious and cosy look for your living room. Luckily, we’ve got some suggestions for you. See 15 different design styles and pick one that speaks to you. Or if you’re into visual illusions that make your space look bigger, we’ve suggestions for that too.
2. Play with colour

Now that you’ve got your vision down, it’s time for the fun part — paint sampling. If you’re particular about colour shades, we highly recommend purchasing paint samples first. This allows you to swatch the actual paint on your walls and see how it reacts in your space with natural lighting, lighting fixtures, and against your furniture. Our 20ml paint sample sachets were made just for that — reducing wastage, while allowing you to test as many colours as you’d like.
3. Ascertain paint (and sealer) quantities

Here comes math! Approximations can be hard, but we’re here to help. Use our handy paint calculator to get some estimations of the amount of paint you need. All you need is the square footage of your home. If you don’t have that information on hand, fret not.
- As a general rule of thumb, 1 litre of Gush paint gives you 2 coats for a 5 - 6m² surface area.
- Regular bedroom: ~7L. 5L for walls, 2L for ceiling.
- Master bedroom: ~8L.
- Sealer: 1 coat of sealer is you'll need. Once you've determined your paint quantity, divide that by 2.
These approximations may differ from home to home, depending on the number of walls and sizes. We always recommend using a sealer first. It’s a white base that seals off impurities in your wall, improves paint adhesion, and let’s your colour choices shine brighter for longer.
4. Choose between stain-resistance or humidity control

Once you’ve sorted out the quantities, it’s time to make the choice between Gush Care and Gush CleanCare and place your order. Both paints come with 6 features in 1. We generally recommend Gush Care for ceilings, bathrooms and areas prone to humidity. If stains are your concern, Gush CleanCare is the better choice, especially for playrooms and living rooms. Good news — both paints are air-purifying, anti-moulding, anti-bacterial, odourless and non-toxic. Find out more about our paint variants here.
5. Gather your supplies

We have a special DIY kit for those painting single rooms. If you’re painting your entire home, you’ll need
- trays
- tray liners
- rollers
- brushes
- drop sheets
- painters’ tape
- extendable pole (for high areas and ceilings)
You can get these at any hardware shop. To make your life easier, ensure that you have one set of supplies per colour. Meaning 1 hand brush, 1 roller, 1 tray/tray liner per colour. This reduces your need to wash brushes or worse, contaminate them.
6. Protect, protect, protect.

Don’t be a hero! Painting is a messy process and mistakes WILL happen. Use painters’ tape across edges and electrical switches. Drop sheets are great for those inevitable drips and splatters. The last thing you need is paint stains on your floor or furniture. Spend some time and meticulously protect every inch. When in doubt, just use more protection. Tape down your drop sheets too, it’s a slippery surface and you wouldn’t want them moving around.
Protect yourself. Our paints may be non-toxic, but we still recommend using gloves, especially for those with sensitive skin. Wear cool and comfortable clothing you wouldn’t mind getting stained with paint. Maybe a hat too, if you’re painting ceilings.
7. Seal your walls

Sealing is an essential part of the painting process. Beyond sealing off impurities and allowing your top paint coat last longer, it also acts as a blank slate for your walls. Its white shade will evenly coat your walls and help especially when you’re transitioning from dark colours to light colours. 1 coat is all you need. Stir first.
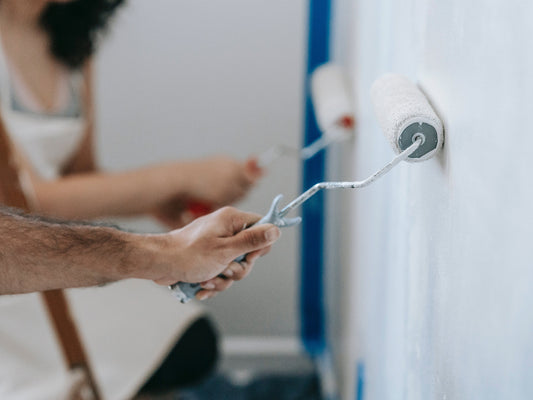
8. Start painting!
 You’ve made it this far. Grab a friend or two, open your windows, and start going at it. Always give your paint tubs a good stir first before you start pouring them into your paint tray.
We recommend starting with a smaller brush to cut around the edges of your walls. Think of it as painting a huge border around your walls. Then go ham with the roller. Paint in sections till you get a semi-even first coat. Once your first coat is done, you’ll need just 1 hour or so till it’s touch dry and it’s time for coat number 2.
Important note: In a single room, start with completing dark colours first, then light colours. This is to prevent accidental cross-contamination of colours. When dark colours splash on light colours, that’s a harder cover-up job than the inverse.
9. Remember to take breaks

Painting can be quite exhausting on the body even if you’ve got good company and good music playing in the background. We’ve curated 3 different playlists to set the mood for you — Bold, Tranquil and Cosmic. Pick your vibe and go with the flow. Drink plenty of water, and take breaks when you’re feeling sore. By painting room by room, you can split your project into a few days, keeping it doable and not utterly overwhelming. Because our paints are odourless and non-toxic, you can definitely sleep in the same space the day of painting without worrying about any health implications.
10. Clean up and admire your handiwork

At the end of every day, clean up is necessary. Peel off those painters’ tape and see your edges look crisp and professional. Super satisfying. Remove all drop sheets carefully, folding them together and ensuring dried paint remnants remain inside. Dispose accordingly. Give your floors a little sweep and mop. Shift your furniture back.
Be careful not to bump into your walls for the next couple of days as your paint starts to cure. Dump your brushes and rollers into a bucket of water and wash them thoroughly.
You can keep leftover paint for up to 6 months in a tight container (or its original packaging, taped shut). Ensure its stored in cool and dry place. Leftover paint can be used for touch-ups when you spot little mistakes here and there. Just be careful that for darker paint colours, touching up can cause and unevenness of colour due to oxidation of paint. The quicker you spot the mistakes, the better.
Conclusion
After completing your very own DIY paint project, you should be ever so proud of your work. You’ve singlehandedly transformed your space, with a little colour. Take a moment to appreciate yourself and all the hard work you put into it. Just know that with Gush paints, you’ll live with peace of mind that your air is free of VOCs, your walls mould-free, and so much more.